 on the Remote Systems view.
In this section, we will describe how you can develop a program in the image on the VM. Therefore, whenever we mention Minix we mean the Minix 3.1.8 image on the VM.
Eclipse's RSE plugin is described in its User Guide as follows:
The Remote System Explorer (RSE) is a perspective and toolkit in Eclipse Workbench, that allows you to connect and work with a variety of remote systems. With the predefined plug-ins, you can look at remote file systems, transfer files between hosts, do remote search, execute commands and work with processes.Basically, the RSE plugin allows you to edit files that are stored on a remote system. In LCOM, in the computers of the B-building, you will run Eclipse on Linux (although, in principle you can also do this in Windows as the necessary applications are also installed on that OS) and use RSE to edit files on the Minix installation running on the VBox. You can use it also to run the compiler and to run the compiled programs, although I prefer to use ssh on a Linux terminal for that. Of course, your preferences may be different.
To run the RSE plugin, you need to start Eclipse. Again, you can find Eclipse using Unity's Dash on Ubuntu Linux, following the steps described above to run VBox.
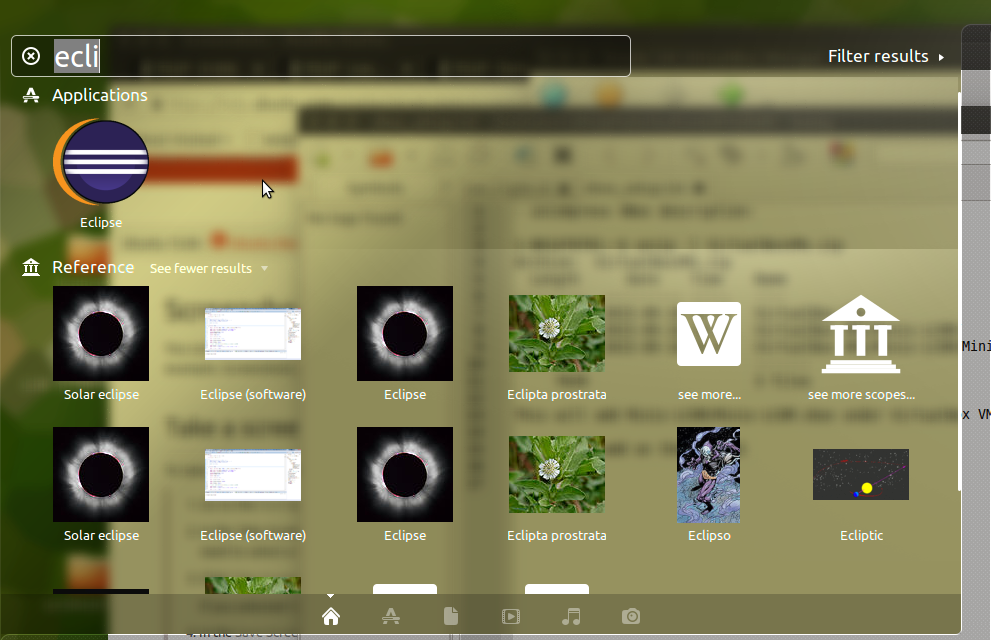
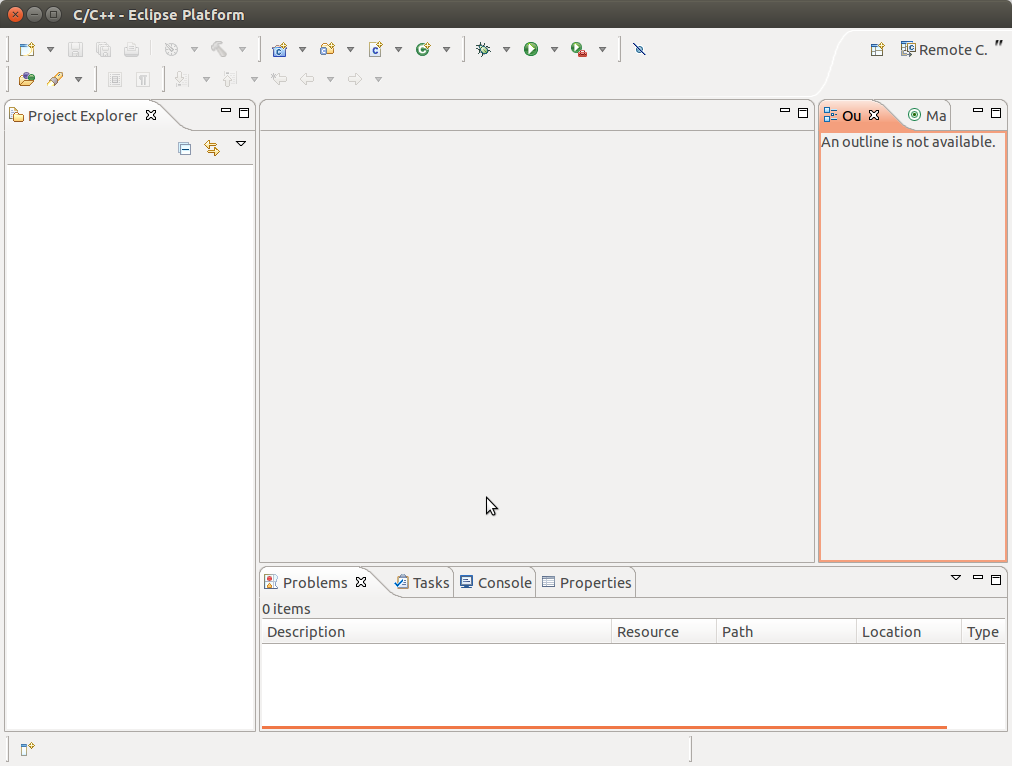
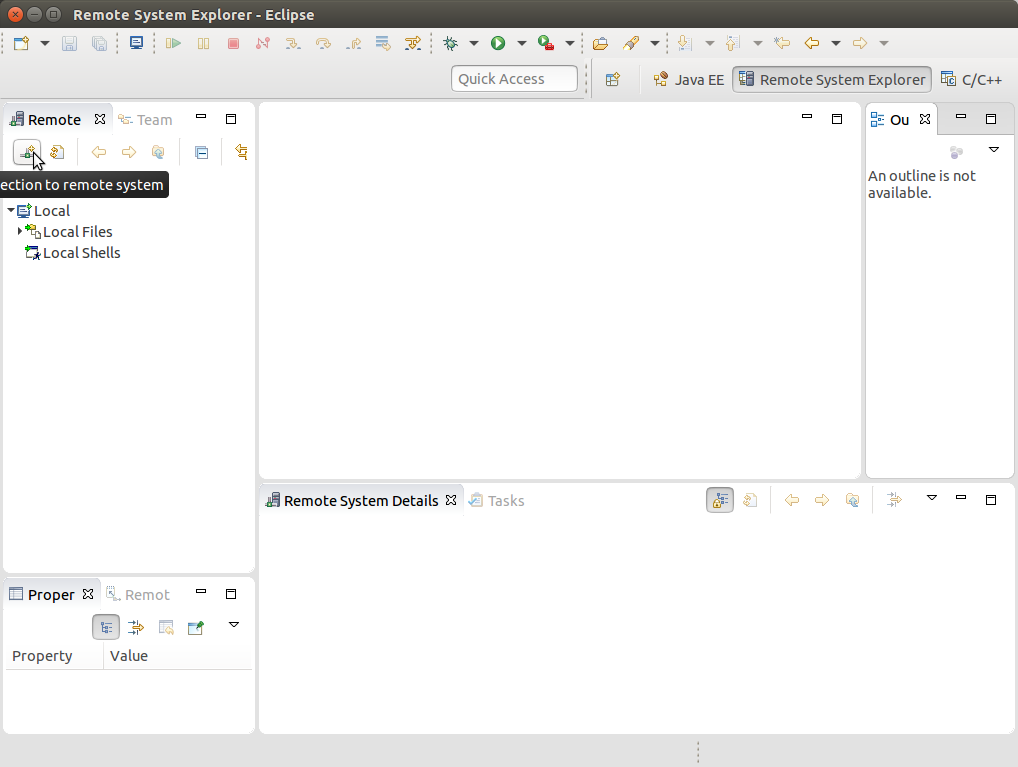
By clicking on Eclipse's icon, Eclipse starts on its default perspective:
To access Minix on VBox, you need to select the "Remote System Explorer" perspective, by clicking on the "Open Perspective" icon (the one with a window and a star) and select the Other... menu entry, as shown:
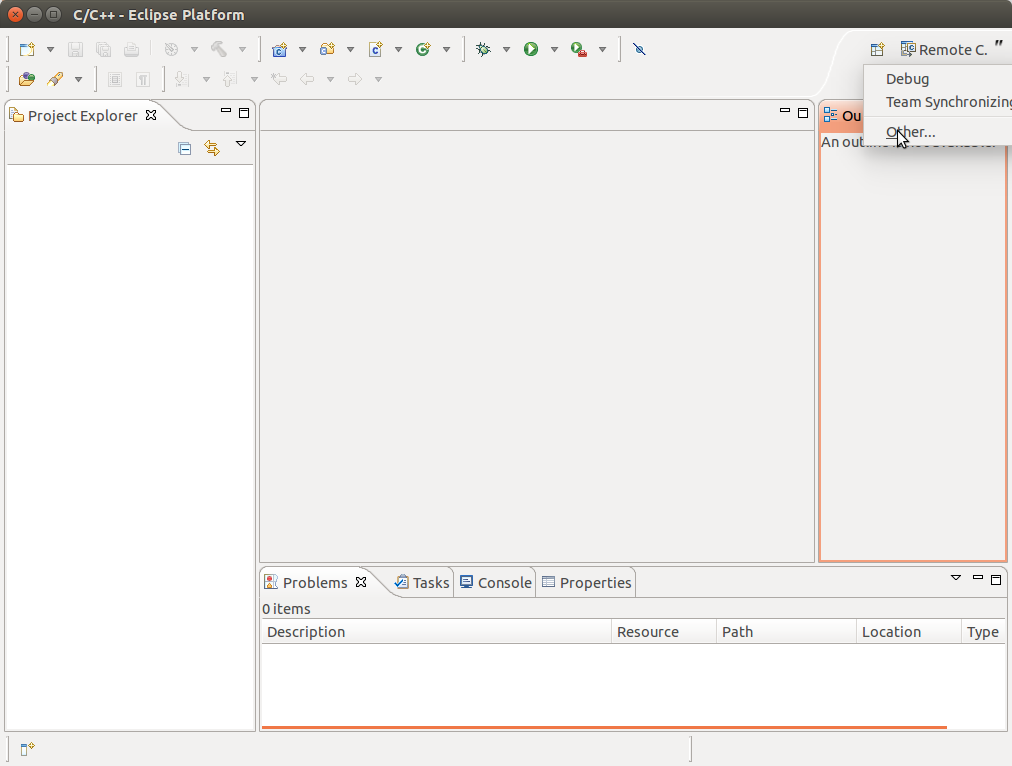
Alternatively, you can use the menu Window > Open Perspective > Other... . Either way you'll get a dialog as the following:
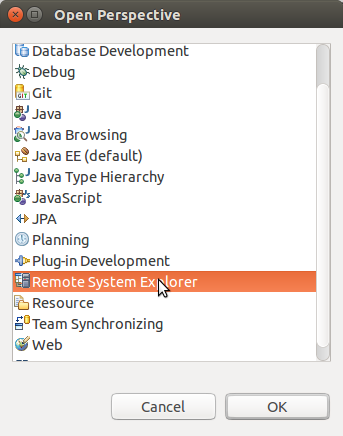
Now, just select the Remote System Explorer in the list and press the OK button.
Now you need to configure RSE, i.e. define a connection to Minix, by selecting the corresponding icon on the Remote Systems view.
At this point you should choose SSH Only as the type of connection, and fill in the window to define the connection properties as shown:

The critical information to fill in is the Host name field, which must be filled with the IP address of the VM that Minix is using. Because, we have configured VBox's network to use NAT, you can leave the default value LOCALHOST, or use 127.0.0.1 instead. The connection name, may be any you deem to best describe this connection; it will be shown in the list of connections of the remote system view. We are using Minix-VB. The description is not very relevant, and probably you can leave it empty. Finally, because we are using LOCALHOST (or the IP address) as the host name, it is irrelevant whether or not you check the Verifiy host name box.
After presssing “Finish”, the “Remote Systems” tab on Eclipse’s main window should now contain the “Minix-VB” item. However, we are not ready, because the Virtual Box is using NAT and it maps the host's port 2222 to the guest's default SSH port, i.e. port 22. Therefore, we need to change the connection port from 22, the default, to 2222, the value VBox is using. (If you have not understood this paragraph, do not worry: please just follow the instructions, and be patient -- next year, i.e. in the 3rd year, you will have courses where you'll learn enough to understand it.)
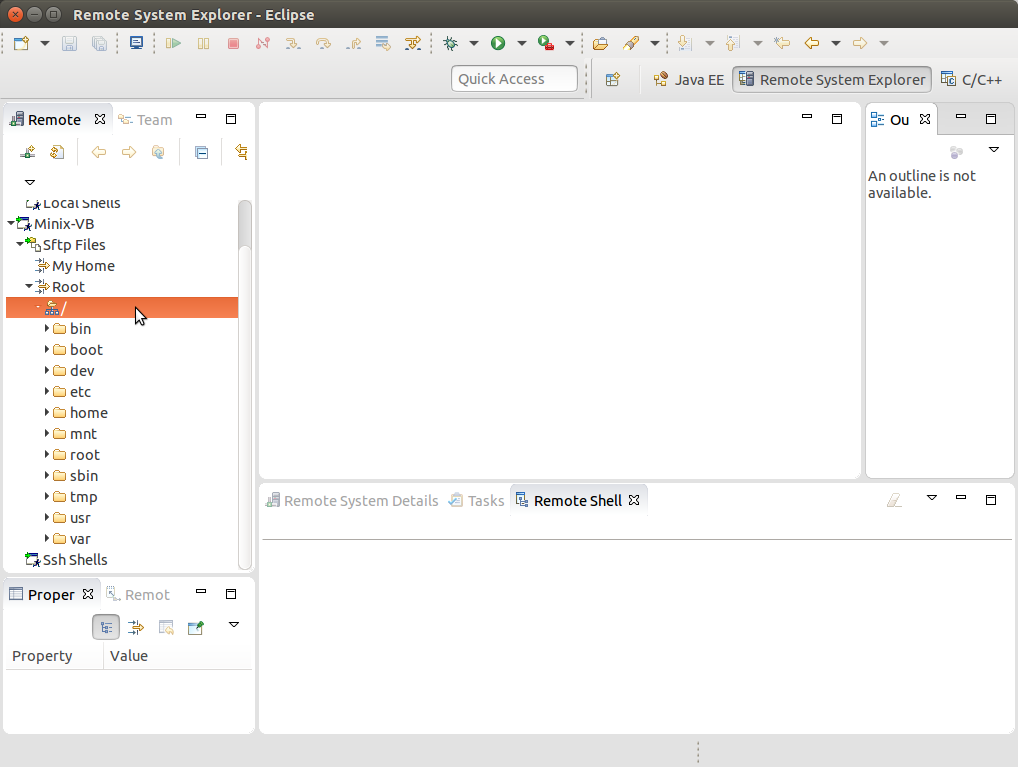
To set the port number, expand the "Minix-VB” connection by pressing the triangle to its left. The RSE view should change to something like:
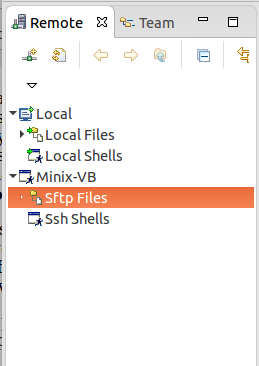
Right click on Sftp Files and choose Properties on the menu that pops up. A dialog similar to the image should appear:
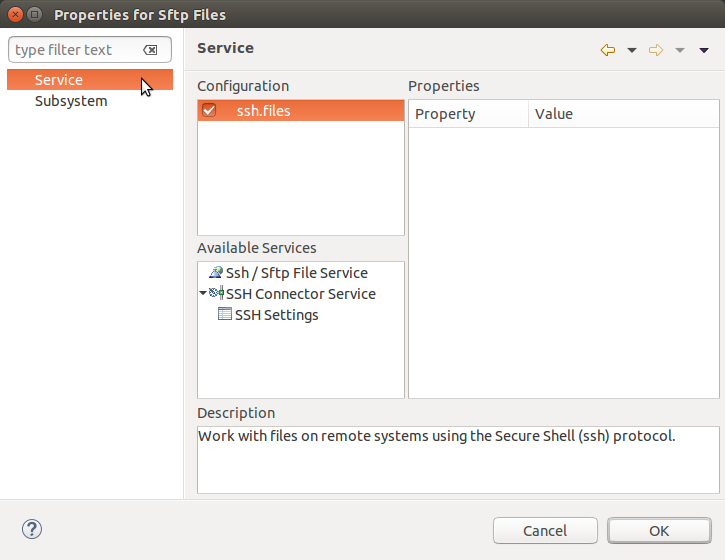
On the left, select the “Subsystem” item. The window should change to something like:
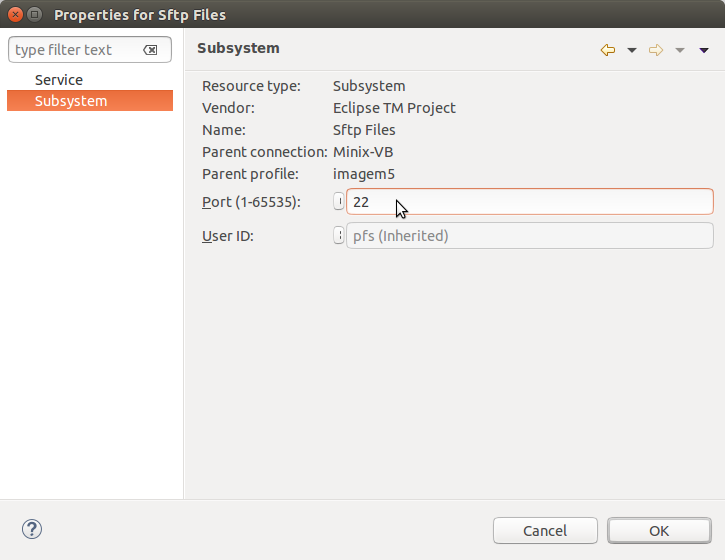
Finally, enter 2222 on the Port (1-65535) text field, and press OK. Now, do the same for Ssh Shells. Most likely, the port will already be set to 2222, but check it anyway.
You can use the RSE view on the left to browse lcom's user space on Minix, labeled My Home, or the Minix root file system, labeled Root. By clicking on any of these directories, you'll be prompted to (remote) login on Minix-LCOM:
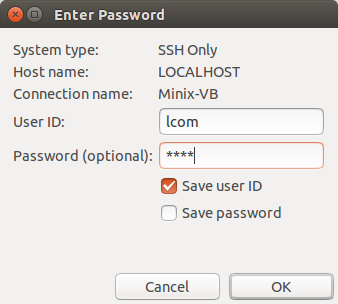
Login as user lcom, remember its password is lcom. If you wish, Eclipse can save your credentials on Minix, by checking the corresponding boxes. After pressing the OK button you should be logged into Minix, and you can now browse the content's of its (virtual) file system
The home directory of user lcom on Minix contains only a few hidden files and they will not be shown, therefore My Home appears empty. (It is possible to change this behavior, but there is no need in LCOM to see hidden files.) The following snapshot shows the content's of Minix's root directory.
By clicking on My Home with the mouse's right button, Eclipse will show up a menu. By clicking the New entry, a submenu that allows you to create a new file or a new folder is shown. I suggest that you create first a directory (folder) named lab0 for this lab. The RSE view will show the new directory under My Home.
Now, move to that directory and create a new file, with name hello.c. A file with this name will now appear in the RSE view under lab0 folder. To edit it, double click with the mouse's left button. This will show an empty canvas in the middle of the Eclipse window. You can now write an "Hello World" program.
To compile and run the new program you need a CLI on Minix. (Of course, you may also use this kind of interface to create the lab0 directory, or even to create hello.c file.) There are at least 2 alternatives to get one CLI:
We suggest that you use the second alternative above, which is detailed in Section 4 of LCOM's Development Process (Part 1: Minix login).
Anyway, to compile an run your program, on the CLI of your choice, just execute the following commands:
$ cd lab0
$ gcc -Wall hello.c -o hello
$ ./hello
You may wish to try using multiple remote terminals/shells. For example, use one to compile your program, and another to run it. This will be very convenient on future labs, as you should compile your programs as user lcom, but you can run them only as user root.
Note: The Minix 3 image also has a couple of text-based editors, including vim, a somewhat sophisticated editor (although I'm not a vim user and do not know which features are supported in Minix's version), and nano, a simple and easy to use editor. You can use them directly from Minix CLI either on the VBox or by running ssh on a Linux terminal or even on RSE ssh terminals (do not try to run them on RSE's ssh shell.) My advice is that you stick to Eclipse's default editor.