In May, you'll develop a project that consists of a Linux device driver for the PC's serial port. This project will be developed in groups of two students.
Because device drivers are part of the kernel, and you do not have root permission on the lab computers, you'll be using a virtual machine (VM), more specifically a VM created by VirtualBox.
A VM is a program that emulates the HW of a PC. The VirtualBox is a "virtualization application". I.e. it is an application that can be used to create, configure and run virtual machines.
In this lab class you'll learn how to create a VM under VirtualBox.
When we use a VM we need to consider two OS's. The first one is the OS that runs on the physical machine: this is usually known as the host OS. The second is the OS that runs on the VM: this is usually known as the guest OS. Note that, when running, a VM is just a set of processes/threads on the host OS.
The VirtualBox is available for different host OSs, including Linux, MacOS and Windows. It is also able to create and run VM with different guest OSs. In this course, we will use as guest OS only Linux, more specifically version 4.0 of the Debian distribution, Debian 4.0 for short.
The VirtualBox is installed only on the Linux images of the computers in the labs of the B building. So, in the classes you'll be using Linux also as the host OS. To run the VirtualBox all you need to do is to find the appropriate sub-menu in the Applications menu, and select the Virtual Box OSE item.
For a more detailed overview of the VirtualBox and its capabilities, you may wish to read the first chapter of its User Manual
You may want to install the VirtualBox on your PC or laptop. In your computer, you may choose whatever host OS you have. Note however, that these notes were written specifically for the Linux OS. This usually applies to the MacOS as well. However, most of it does not apply to Windows. So, if you choose Windows as your host OS, you'll be on your own. (Future notes will also be written for Linux.)
If you choose Linux, I suggest that you check first if your distribution has packages with the VirtualBox. I expect it to be the case for the major distributions. E.g. the Debian and Ubuntu distributions have several packages with the VirtualBox. Just in case, try to install all of them.
Anyway, it is a good idea to install the so-called Guest Additions, which are software components that provide additional features.
For details regarding the installation of the VirtualBox you can take a look at the second chapter of its User Manual.
A virtual machine is an emulation of the HW of a PC, on top of which runs the guest OS.
The VirtualBox may have several virtual machines each with its own configuration and its own guest OS. When you first start the VirtualBox OSE it has no virtual machine defined.

Thus your first task will be to create one, by impporting an appliance. In the following paragraphs, we'll detail the steps you'll need to take to complete this task. All these steps assume that you are working on a computer in one of the computer labs.
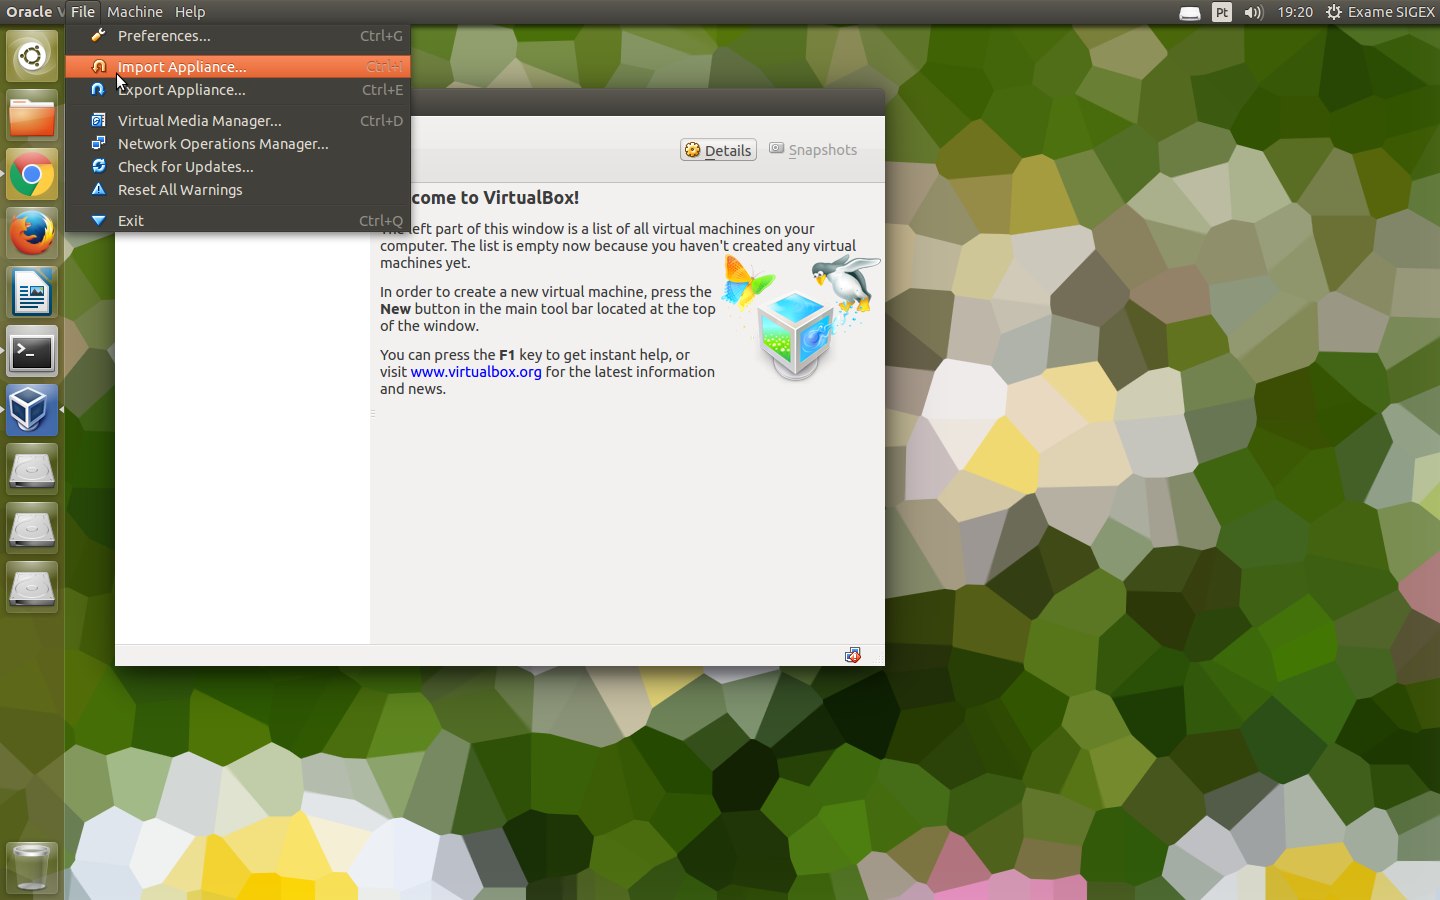
Step 1 Select the Import Appliance option from File Menu
Step 2 Select the VM image /opt/ucso/CICA2.ova in the dialog box:

press next.
Step 3 Change the Virtual Disk Image directory to /tmp/ in the appliance settings dialog:

and press the Import button. The VirtualBox image will then be copied to a local directory, i.e. a directory in the local computer, that you are authorized to access, both for reading and for writing. Given the size of the image and that you are copying it to the same local disk this may take around one minute. Once the process is complete you will see one VM image named CICA2 in the list of VM installed on the left side of the VirtualBox OSE's main window:

Because the image used by the VM, i.e. the guest OS, has no GUI, you'll find yourself doing most of the coding in the host OS, and then copying that code to the guest OS, and compiling it there. This modus operandi is made easier by the means of the shared folder mechanism, which allows the guest OS to access selected portions of the host OS filesystem.
In order to setup a shared folder you must first define it. One way to do it is to select the Settings orange icon. This pops up the Settings window. Then on the list at the left of this window you should select the Shared Folders item. Next select the icon with the folder and the plus sign on the top right corner. This pops up another window where you need to configure the shared folder by 1) specifying the path of the folder in the host OS you wish to share with the guest OS; 2) giving it a name. To specify the (absolute) path of the folder you can either type it directly in the corresponding text box or you can select it using a file system browser. In any case, I suggest that you create a folder specifically for this project, and define it as a shared folder. The folder name should be host. (Actually, this name may be arbitrary, but the guest OS installed on the disk image is configured to mount a folder with name host, so by choosing this name you'll avoid some additional configuration changes.)
For more details regarding shared folders you can read the respective section in Chapter 4 of the User Manual.
Because the /tmp/ directory is temporary, your VM image will be deleted every time you shutdown the host OS. This means that, when you start the VirtualBox for the first time in every class, VirtualBox OSE will list VM CICA2 as a configured VM, but the VM's image will have been lost.
To recover that image you will need to repeat all the steps described above in Section 2.1. However, for these steps to succeed, first you must delete the VM. For that, the easiest is to use a terminal and execute the commands shown next:
$ cd ~/VirtualBox\ VMs/
$ rm -rf CICA2 At this point you can start your newly created and configured VM, by pressing the green Start icon, at the right of the Settings icon.
Please read carefully the first message regarding keyboard capture. You can find more info regarding this feature in the Capturing and releasing keyboard and mouse in VirtualBox Manual Chapter 1. Also useful is the section that follows the previous one: Typing special characters.
After pressing the OK button, you get the boot screen. You need not take any action. After about 30 seconds you'll get a login prompt. The Linux system running on the VM has one account so whose password is: so. For the rare occasions you need root permissions, you must use the sudo utility.
Now, you can try out the development process outlined above.
In the host OS, create the hello.c file under the shared folder with an "hello world" program, using your favorite text editor.
In the guest OS, log in as so. Change to the subdirectory under /host where the hello.c file you've just created resides. Now, compile it, using the standard command:
gcc -Wall hello.c -o hello
If there is no error, you can run it (on the guest OS):
./hello
Otherwise, you need to fix the errors in your text editor running on the host OS and again compile the file in the window running the guest OS.
As you can see, this is not very different from the steps you would take when you develop code without a VM and compile and test it in a separate terminal.