This note is about how to set up an environment that allows communication between two virtual machines (VM) running on different computers via the virtual serial ports.
This setup is useful for virtually all projects that use the serial port. Indeed, most of you are developing games and it is not enough to connect two VMs on the same PC. This is because you usually need both instances of your application to respond to input from either the keyboard or the mouse. It turns out that you can have the focus on only one VM, therefore you cannot generate input events to one VM, while the focus is on the other. If in the multi-user version application you plan to develop, users can take turns, this is not so problematic. Otherwise, running two VMs on the same PC will not work.
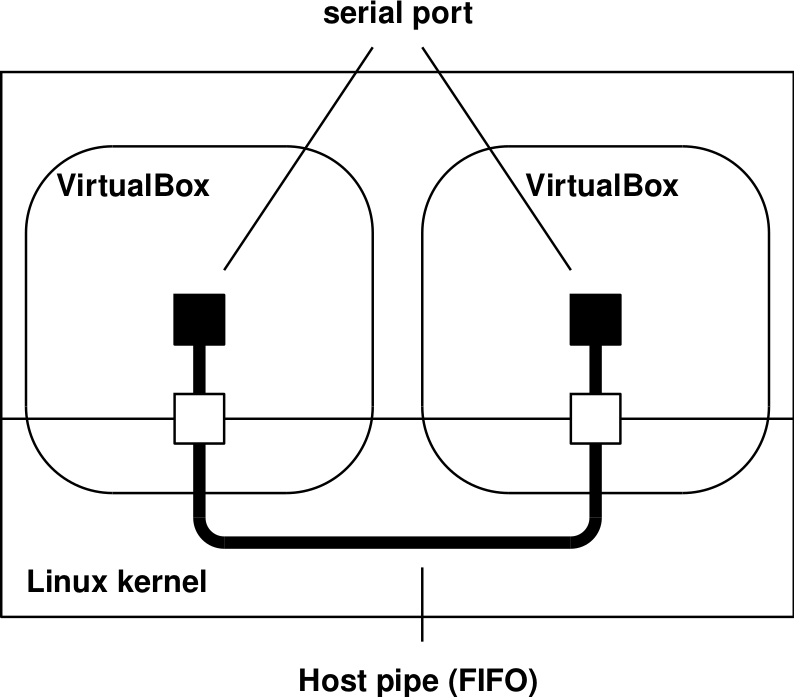
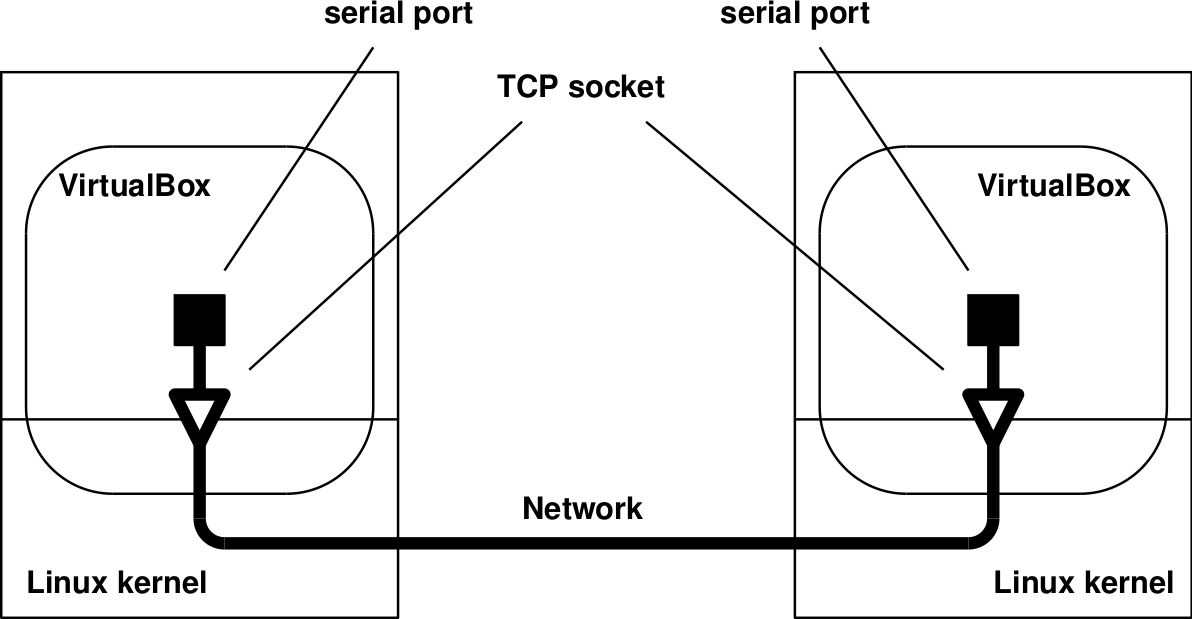
With VirtualBox 5.0.x the solution is quite simple. Actually, it is very similar to the solution described for the communication between VMs running on the same computer. The difference is that instead of using pipes to interconnect the two VMs, which allow communication only between processes on the same computer, you use TCP sockets, which allow the communication between processes (the VMs) on different computers. This is illustrated in Figure 1.
|
|
| (i) VMs on the same computer. | (ii) VMs on different computers connected via a network. |
Indeed, all you need is to configure the serial port of each VM as described next. (We assume that you have the VMs with Minix 3.1.8 for the VirtualBox already installed on both computers. For an easy way to install a VM once you already one installed, please check the notes already mentioned. )
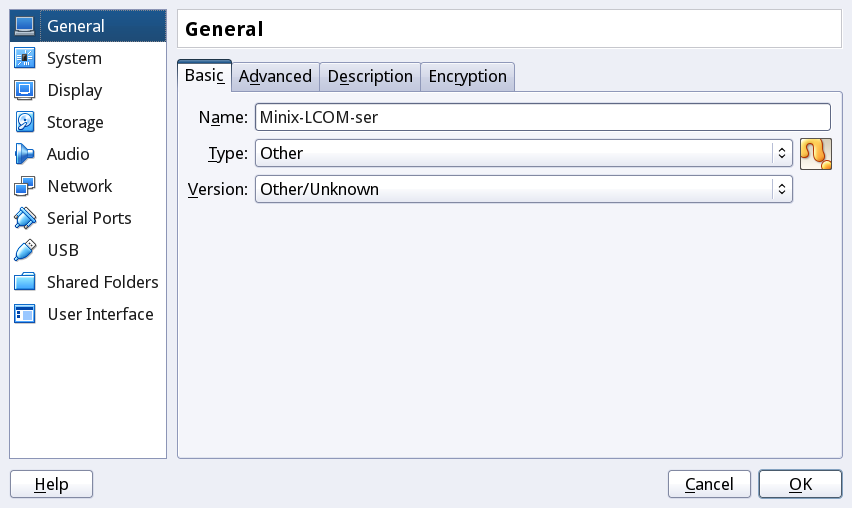
First, on Oracle's VM VirtualBox Manager, select the VM you want to configure and then select the Machine->Settings menu option. The following window will be displayed:
Next choose the Serial Ports entry on the left list, and the window should change to:
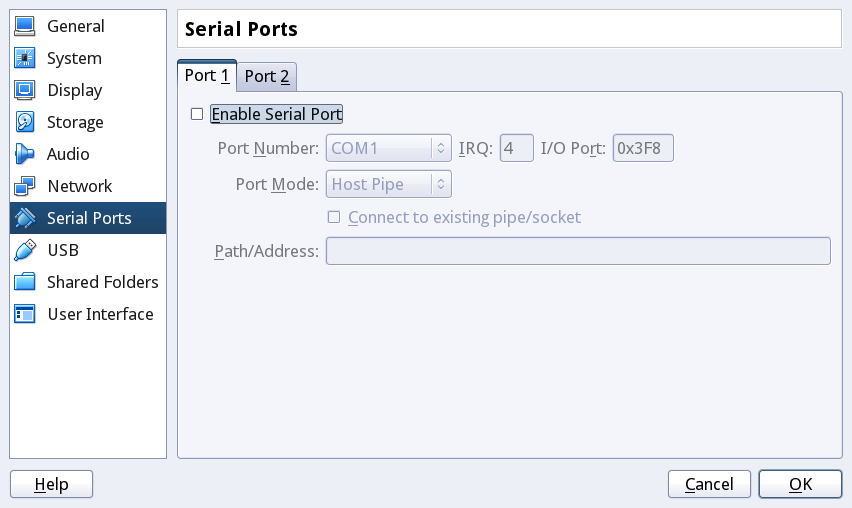
In this window, check the Enable Serial Port box, and in the Port mode: list choose the TCP option rather than the Host Pipe option, as done for setting up the serial communication between VMs running on the same computer. Next, in the Path/Address text box type a port number, i.e. a positive integer number smaller than 65536 (in Unix-like OSs you must select a number larger than 1023).
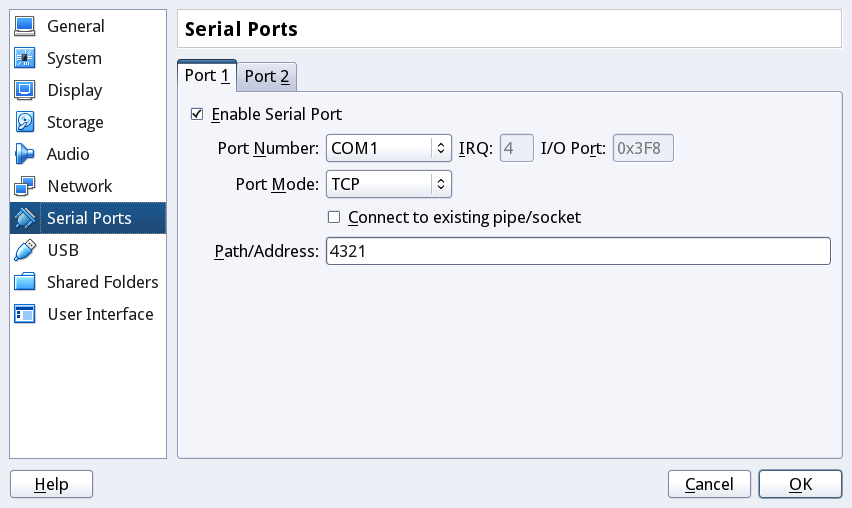
and press the OK button.
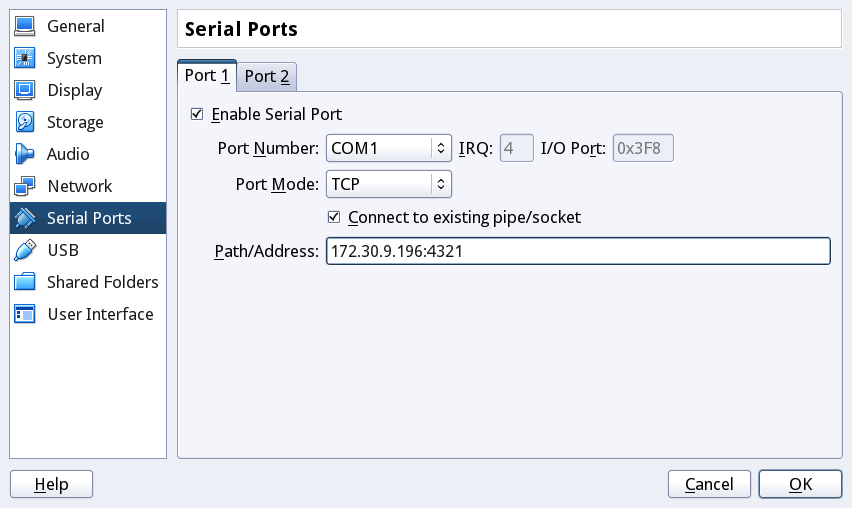
To configure the serial port of the VM on the other computer, you should follow the same steps as above, except for the last one. Indeed, in the window for configuration of the serial port, you should check the Connect to existing pipe/socket box, and in the Path/Address text box you should type a string with the following format <ip_address>:<port_number>, where <ip_address> is the IP address of the other computer (check below to learn how to find that address) and <port_number> is the port number you have typed when setting up the serial port of the other VM:
These steps will add the first serial port to both VMs, i.e. COM1, and virtually connect these serial ports through the configured sockets. Your code will be able to access their UARTs as described in the lectures.
IMP.- Note that the second VM will fail to start, if the first VM is not running already. This is because the remote socket to which its socket should connect is created/destroyed by the first VM, and therefore exists only while that VM is running.
To setup this "communication channel", you need to find the IP address of the first computer. In Unix-like operating systems, this can be done by executing the command ifconfig (in Windows, you can use the ipconfig command instead). The output will look as follows:
$ ifconfig
eth0     Link encap:Ethernet  HWaddr 00:21:5d:62:78:82
          inet addr:172.30.9.196  Bcast:172.30.255.255  Mask:255.255.0.0
          inet6 addr: 2001:690:2200:9a77:221:5dff:fe62:7882/64 Scope:Global
          inet6 addr: fe80::221:5dff:fe62:7882/64 Scope:Link
          UP BROADCAST RUNNING MULTICAST  MTU:1500  Metric:1
          RX packets:23303302 errors:0 dropped:4 overruns:0 frame:0
          TX packets:451083 errors:0 dropped:0 overruns:0 carrier:0
          collisions:0 txqueuelen:1000
          RX bytes:3831961730 (3.8 GB)  TX bytes:108440744 (108.4 MB)

lo        Link encap:Local Loopback
          inet addr:127.0.0.1  Mask:255.0.0.0
          inet6 addr: ::1/128 Scope:Host
          UP LOOPBACK RUNNING  MTU:16436  Metric:1
          RX packets:26131 errors:0 dropped:0 overruns:0 frame:0
          TX packets:26131 errors:0 dropped:0 overruns:0 carrier:0
          collisions:0 txqueuelen:0
          RX bytes:16152047 (16.1 MB)  TX bytes:16152047 (16.1 MB)
The IP addresss is the field inet addr of the eth0 interface. (Assuming you are using the PCs in lab B107. If you are testing via a wireless connection, the network interface will likely be named wlan0.) Therefore, in this example, the IP address of the first computer is 172.30.9.196. (You may also find the IP address, using a GUI. Just start SystemSettings, and select the network icon.)
You can test your setup, by running on the VMs either the code you have developed for Lab 7, or the test program I have provided. You should be able to exchange data in both directions by invoking the test programs with the appropriate arguments.
This paragraph is not important for getting both VMs communicating via their virtual serial ports, but you may find it interesting to learn that you can use TCP sockets not only to connect VMs running in different computers, but also to connect VMs running in the same computer.
Indeed, unlike pipes, which can be used for communication only between processes on the same computer, TCP sockets can be used for communication between processes whether or not they are on the same computer.
To use TCP sockets also for communication between VMs on the same computer, all you need to do is to use an IP address of the local host, including the loopback address (127.0.0.1), or even the word localhost instead of the IP address, upon configuring the second VM:
